Fitting Rattan Webbing To Timber Frames & Panels |
|
The rattan webbing should be soaked in warm water for approximately 30 minutes before fitting.
Soaking for longer period can weaken and darken the cane strands. Fit the webbing whilst wet.
Allow the webbing to dry naturally, do not place near or in direct heat. A cool environment is best.
Also it's best to keep timber frames flat and even clamped to eliminate any warping as well as any glue run off.
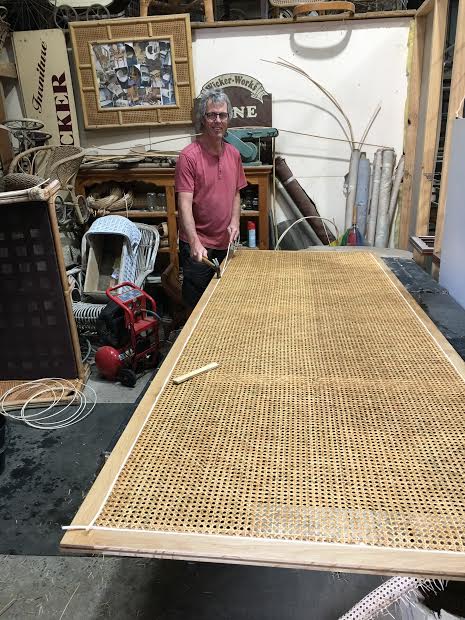
5 Methods of fitting rattan webbing to timber frames and panels.
Method 1. Wrap the webbing over the timber frame, glue and staple.
Method 2. Stretch the webbing flat on the rear of the timber frame, glue and staple. Fit a small timber trim to finish off.
Method 3. Cut a rebate on the inside of the frame, fit the webbing into the rebate, glue and nail a timber trim to finish off.
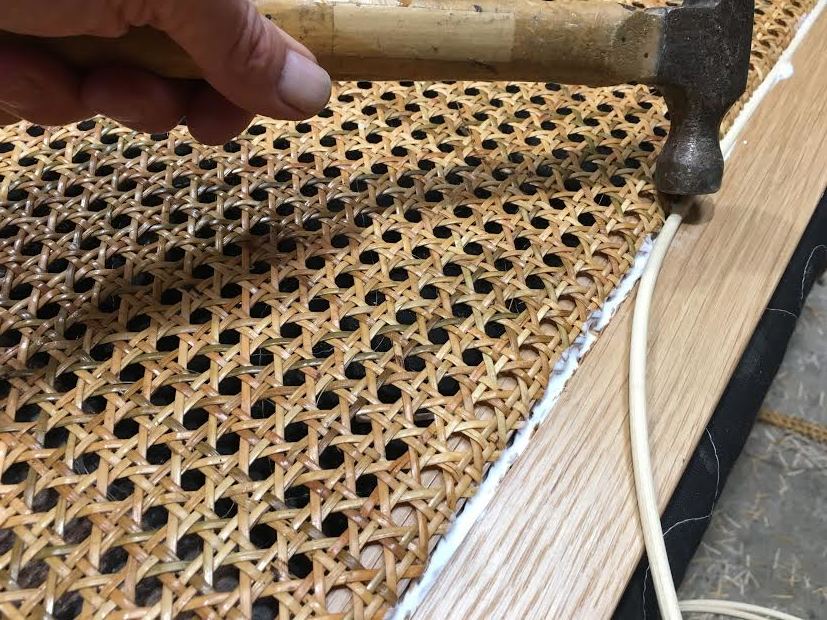
Method 4. Router a groove on the front or back of the frame, and fit the webbing into the groove with glue and a cane spline.
See Images Below
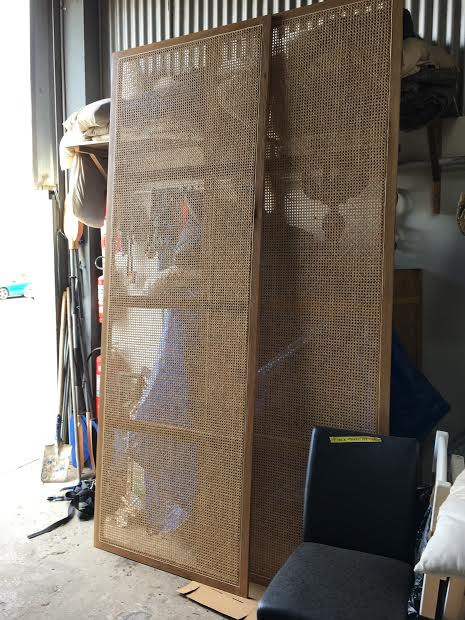
Method 5. You can glue direct onto a panel using Contact Adhesive. With this method you fit the webbing dry. The adhesive must be evenly spread on both the panel and the webbing to eliminate the webbing from bubbling due to humidity.
Tips:
The rattan webbing should be soaked in warm water for approximately 30 minutes before fitting.
Soaking for longer period can weaken and darken the cane strands.
Wipe away any excess glue with a damp cloth. Allow to dry before giving the timber a light sand and applying a finishing coat of paint or lacquer. The best method of applying a stained finish, is to mix the stain in with a lacquer and spray this on. Always use off cuts for testing. It's better for the rattan webbing to be left unsealed on the back (the porous side) as this will allow the webbing to breath ensuring longevity of the material. Rattan Webbing is a Natural Material, and is really best to be left without any application of paint, lacquer or varnish. The best option is to leave as is, or to treat occasionally with Linseed or Orange Oil. The webbing will darken slightly with age.
Please note:
Rattan Webbing may expand and loosen slightly if there's an increase in humidity, but will tighten again in dryer conditions.
Soaking for longer period can weaken and darken the cane strands. Fit the webbing whilst wet.
Allow the webbing to dry naturally, do not place near or in direct heat. A cool environment is best.
Also it's best to keep timber frames flat and even clamped to eliminate any warping as well as any glue run off.
5 Methods of fitting rattan webbing to timber frames and panels.
Method 1. Wrap the webbing over the timber frame, glue and staple.
Method 2. Stretch the webbing flat on the rear of the timber frame, glue and staple. Fit a small timber trim to finish off.
Method 3. Cut a rebate on the inside of the frame, fit the webbing into the rebate, glue and nail a timber trim to finish off.
Method 4. Router a groove on the front or back of the frame, and fit the webbing into the groove with glue and a cane spline.
See Images Below
Method 5. You can glue direct onto a panel using Contact Adhesive. With this method you fit the webbing dry. The adhesive must be evenly spread on both the panel and the webbing to eliminate the webbing from bubbling due to humidity.
Tips:
The rattan webbing should be soaked in warm water for approximately 30 minutes before fitting.
Soaking for longer period can weaken and darken the cane strands.
Wipe away any excess glue with a damp cloth. Allow to dry before giving the timber a light sand and applying a finishing coat of paint or lacquer. The best method of applying a stained finish, is to mix the stain in with a lacquer and spray this on. Always use off cuts for testing. It's better for the rattan webbing to be left unsealed on the back (the porous side) as this will allow the webbing to breath ensuring longevity of the material. Rattan Webbing is a Natural Material, and is really best to be left without any application of paint, lacquer or varnish. The best option is to leave as is, or to treat occasionally with Linseed or Orange Oil. The webbing will darken slightly with age.
Please note:
Rattan Webbing may expand and loosen slightly if there's an increase in humidity, but will tighten again in dryer conditions.
METHOD 4 Fitting Rattan Webbing into a Routed Groove.